As Aerodrome will likely be used on a live track or a public road, it is critical that you have permission to use the device and/or have taken appropriate measures to ensure not only the safety of you and other riders, but also to prolong the life of the device itself.
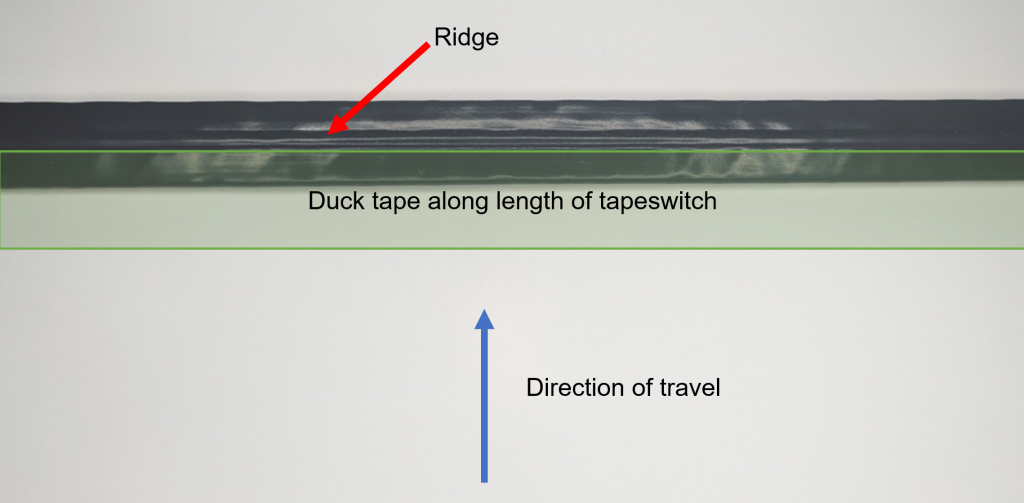
The tapeswitch should be placed so that the flat side is against the track or road, and the ridge on the upper side. Using duck tape, secure the tapeswitch across the line the cyclist will be following, be it on the track or the road. Secure at the far ends with tape, and placing a further piece of tape along the length, just holding down the upstream side of the tapeswitch.
Tape along the tapeswitch, not across it (as below).
Aerodrome listens for Aerosensor and the LED flashes when it receives data. It is only able to transmit the lap trigger when this is happening.
For optimal radio performance, make sure Aerodrome is situated in a position where it can receive data from Aerosensor when bike is at or just past the Tapeswitch. It is normally best to position 1-2m downstream of where the lap trigger is placed. Orient the device so that the buttons are closest to the track, as shown in images below.
Plug the tapeswitch plug into the Aerodrome socket and turn on. The power light should illuminate. You can check it is working by pressing on the tapeswitch. The LED will turn purple for 1 second to indicate a lap trigger.
Aerodrome should be placed on the floor well clear of any area the rider is likely to pass. Secure the tapeswitch cable to the floor with duck tape to avoid trip hazards.
Note that currentlyAerodrome cannot distinguish between multiple Aerosensor’s running on track. It will only work correctly when a single rider is on track.